Jim Varnum
I recently purchased a new set of road bars for my Rodriguez bicycle and decide to add a harlequin accent to the bar tops. The harlequin pattern is created using two colors of cotton tape. While other tape materials could be used, cotton is an ideal choice due to it's strength and durability. This document describes my method for wrapping road bars using this pattern.
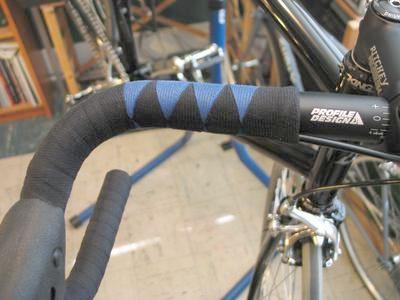
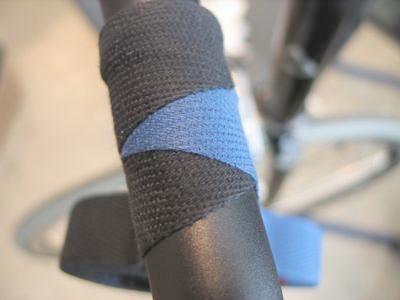
Figure 1 shows the finished harlequin accent. When I do this wrap, I start at the top of the bar (nearest the stem) and work toward the ends. The two most difficult parts of the wrap are:
Of all of the cotton tapes I've tried, I prefer CAT EYE. I've found it to be the most durable and easiest to use. Cotton tape differs from it's foamy/stretchy counterparts in that it has far less stretch. Wrapping with cotton tape requires more effort but the results are, in my opinion, worth it.
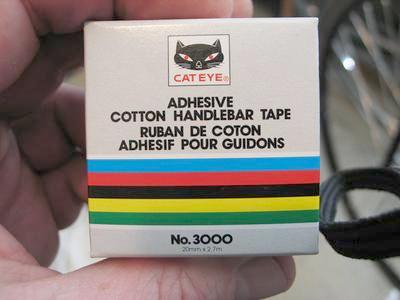
For the traditionalists, a finished cotton tape wrap is usually coated with shellac. Figure 2 shows a box of CAT EYE brand cotton tape.
The harlequin wrap consists of two different colors of cotton tape joined at the ends and wrapped around the bar in opposite directions. The two colors alternately pass over and under each other to form a weave pattern. Because cotton tape stretches very little, it helps to join the two colors together at an angle relative to one another. This allows the tapes to angle toward the ends of the bars which helps during the wrap process. If this statement seems confusing, don't worry, it will be illustrated below. For my bars, I've chosen blue and black tapes.

My method of starting the wrap is to join the two tapes by folding one over the other at an angle. Once started, the wrap appears to simply emerge from beneath itself with no visible ends requiring additional tape to secure. See Figure 2a.
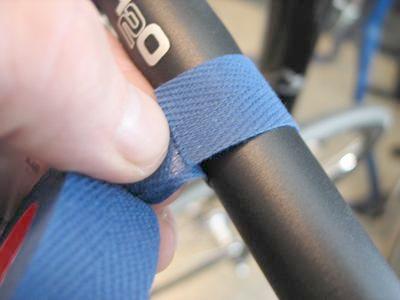
Begin by wrapping one end of the blue tape around the bar to guage the amount of tape required to perform the first wrap. Mark the point of intersection with your finger. See Figure 3. Just 'ball-park it, there is no need for high accuracy here.
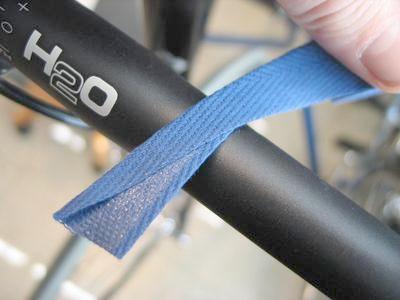
The initial fold is formed on a diagonal from one corner (at the end of the tape) to the opposite edge, over the length of one turn. The fold will be oriented toward the stem and should be made so that the tape will angle toward the bar end as shown in Figure 4.

The black tape is then folded over the blue such that the two tapes angle toward the end of the bar. Also, make certain that both colors are joined such that their sticky sides are the same side .... sounds obvious but it's easy to get this wrong. See Figure 5.
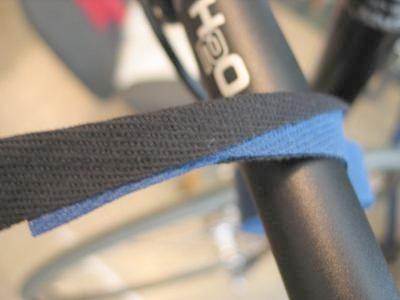
Figure 6 shows the two colors folded and joined and ready to begin the wrap. Note that the tapes form a shallow angle relative to one another. This creates a very clean start wrap and angles the tape for easier wrapping as mentioned before.
Wrap the blue tape once around the bar. It is important to note that neither tape overlaps itself as would be the case during a conventional wrap. So the edges of the blue tape should touch but not overlap. See Figure 7.
Next, wrap the black tape once around the bar as shown in Figure 8. This wrap should cross over the blue tape. Now, the benefits of joining the two colors at an angle can be seen.
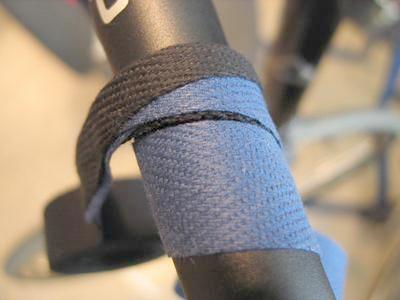
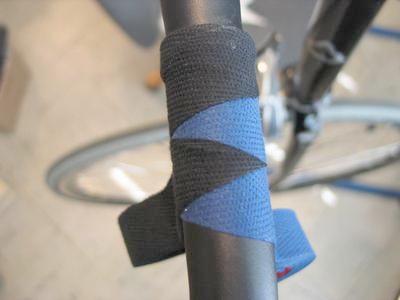
Pull the blue tape back and wrap the black tape around the bar one more time. This sets up the first weave that gives the harlequin wrap it's distinctive look. At this point, the blue tape should appear to be squeezed out from between adjacent wraps of the black tape. See Figure 9.
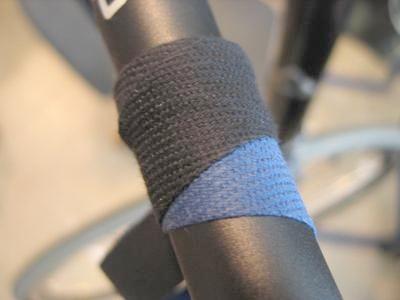
As shown in Figure 10, unfold the blue tape so that it lays over the black and wrap it around the bar.
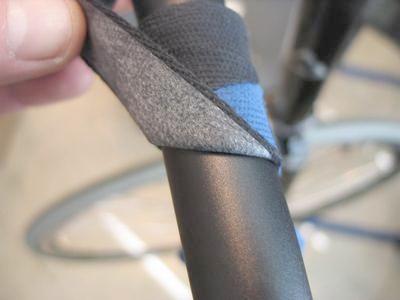
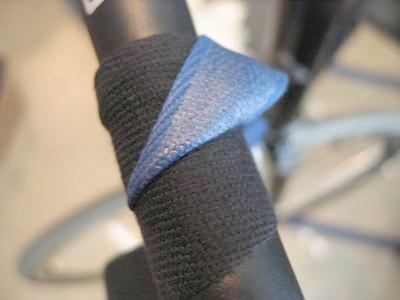
Now, pull the black tape back to allow the blue tape to pass under it. As mentioned, both tapes are simply wrapped around the bar in opposite directions with no overlap. In this way, each color is laid in an over/under alternating weave. See Figure 11.
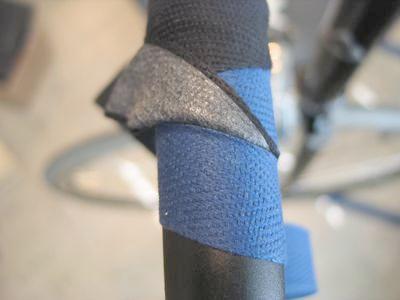
Figure 12 shows the blue tape laid under the black and pulled tight.
Finally, the black tape is unfolded and laid over the blue. The process is repeated for the desired length of the wrap. See Figure 13.
This document attempts to describe my method for wrapping handle bars in a harlequin pattern. Patience and some trial and error will probably be necessary to get the hang of it and to match both the left and right sides of the bar. It may be helpful to practice using some inexpensive tape on a broom handle or dowel firmly secured in a vise. This will help develop a feel for the process.
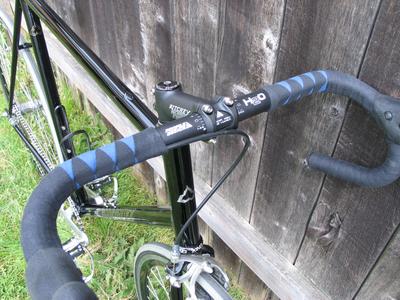
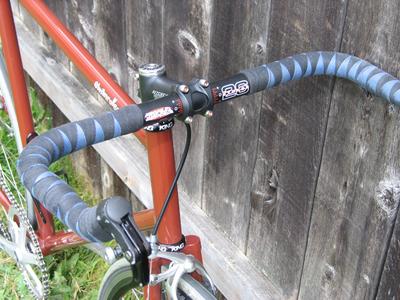
Whether this pattern is used to accent the bars as illustrated here and shown in Figure 14, or to wrap it's entire length as seen in Figure 15, the harlequin wrap is a nice way to make your pretty bike just a little bit prettier ..... Enjoy.